
Configuring PPPoE in Windows 7 |
Configuring PPPoE in Windows 8 |
Configuring PPPoE in Windows 10 |
Configuring the TP-LINK TL-WR840N/Archer C7 Wi-Fi Router |
1. In the “Start” menu and select “Control Panel".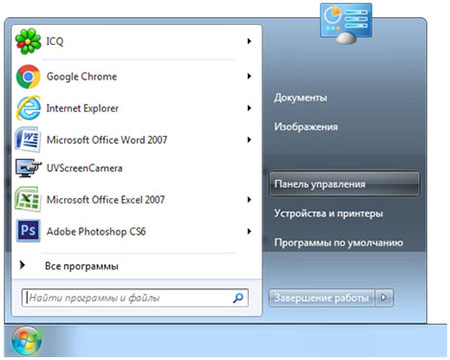 |
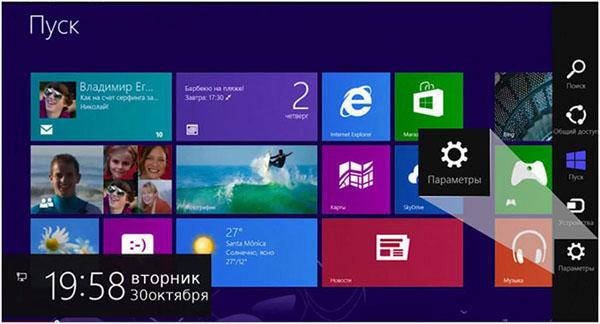
1. Open The Control Menu. For this: a) If you are using a mouse, move the cursor to the upper-right corner and swipe it down; b) If you are using a touchscreen, touch the right side of the screen and swipe to the center. In the menu that appears, select “Options”. |
1. Click the "Start" button, go to “Settings".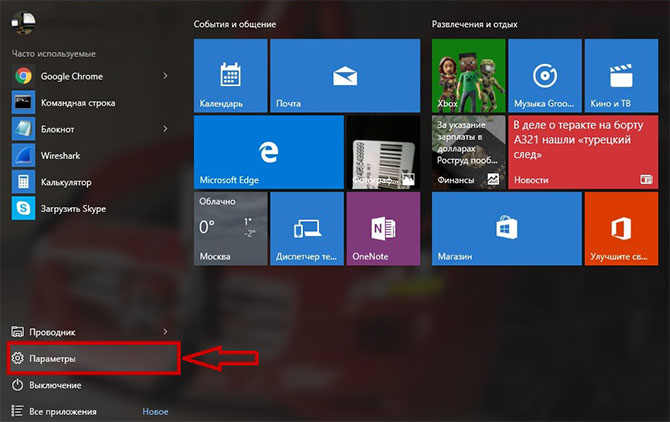 |
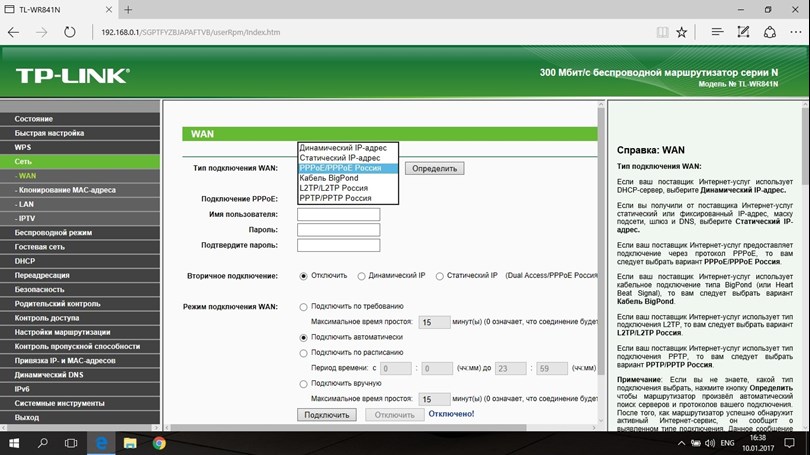
Setting up an Internet connection You need to open your Internet browser and type 192.168.0.1 in the address bar, Username is admin, Password is admin (provided that the router has factory settings and its IP has not changed). |
2. In the Computer Settings window, select the category ”Network and Internet”.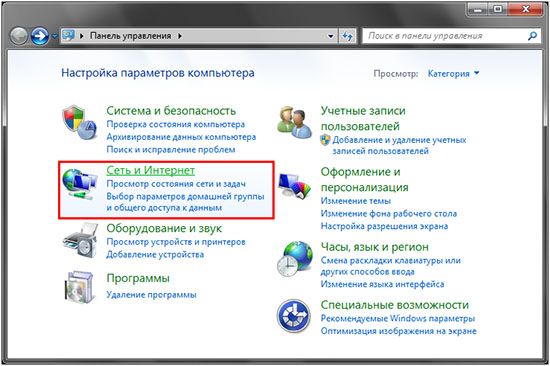 |
2. In the next menu, click on the “Control Panel" item.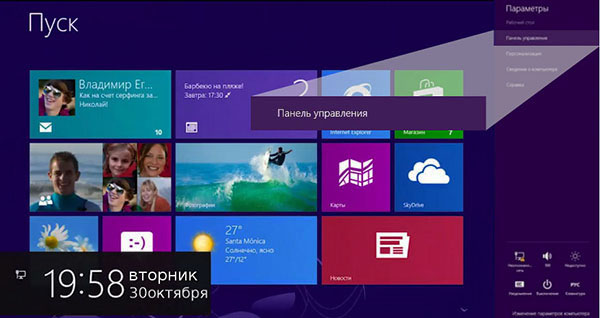 |
2. Select the item “Network and Internet". |
In the router's interface, go to the Network tab, WAN menu. In the field The WAN connection type is selected: PPPoE |
3. Next, select “Network and Sharing Center” in the window that opens.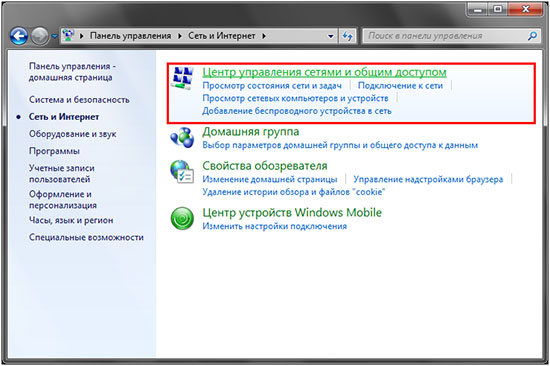 |
3. On the Control Panel, find the “Network and Internet“ section and select ”Internet connection".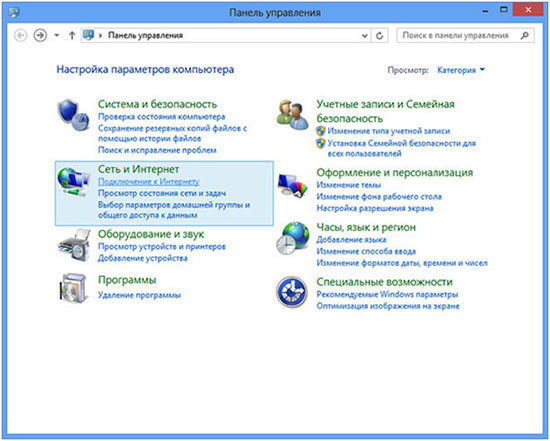 |
3. In the left column, go to “Dial the number".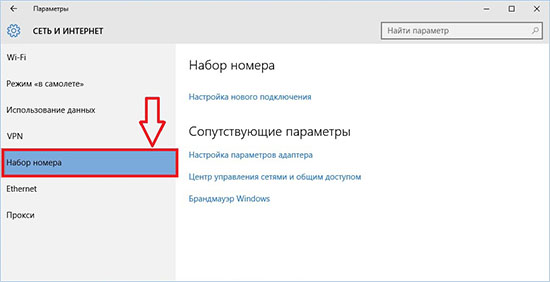 |
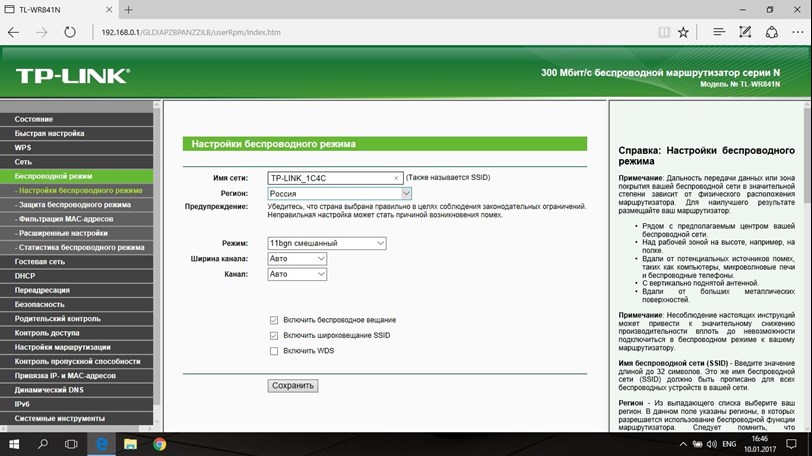
Setting up Wi-Fi on the router Setting up a Wi-Fi connection. Switch to Wireless mode in the side menu. In the window that opens, enter the following settings: Field Network name: enter the name of the wireless network (it can be any) |
4. In the left panel, click on “Change adapter settings".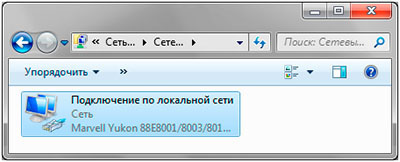 |
4. Next, among the connection types, select “High-speed (with PPPoE)”.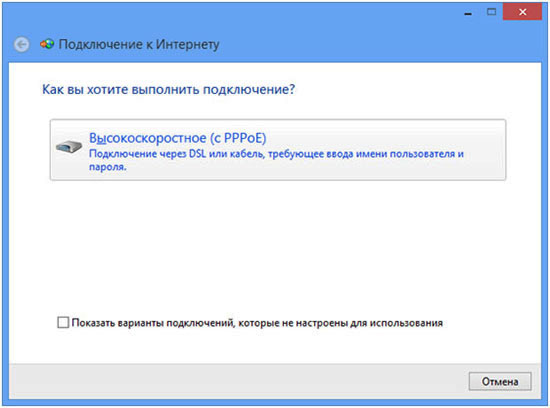 |
4.Click on the  |
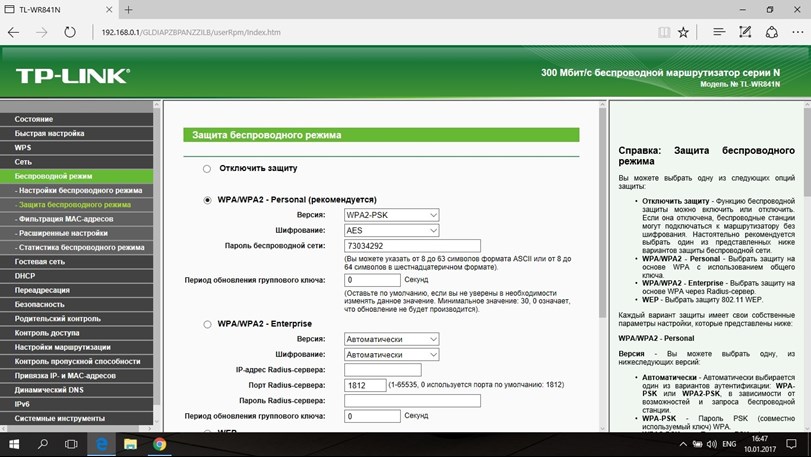
Setting up the Wi-Fi password. In the side menu, go to Wireless Mode Protection.: Select the encryption type WPA-PSK/WPA2-PSK |
5. Right-click on the “LAN Connection" icon.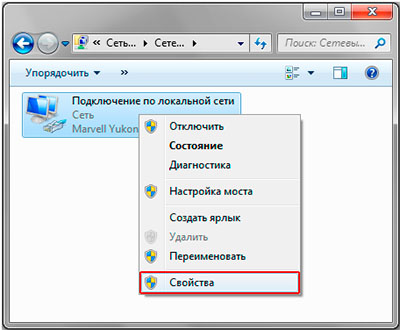 |
5. The system will request your credentials. Enter the username and password specified in the agreement. You can set an arbitrary “Connection name". After everything is entered, click the 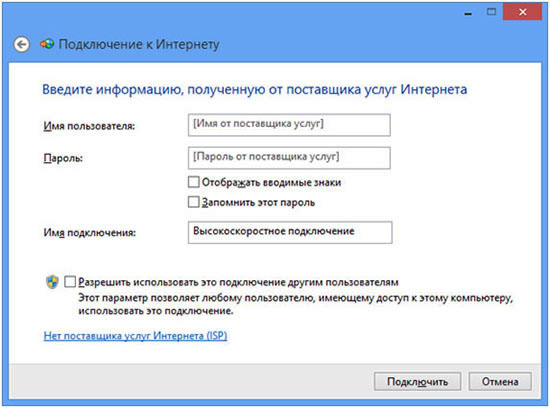 |
5. Select “Internet Connection" and click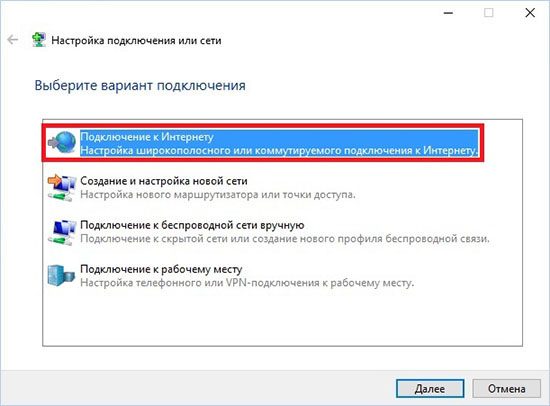 |
The router setup is complete. |
| 6. Select “Properties” from the context menu. |
6. If everything is entered correctly, then after a few seconds of checking the connection, you will be able to access the Internet!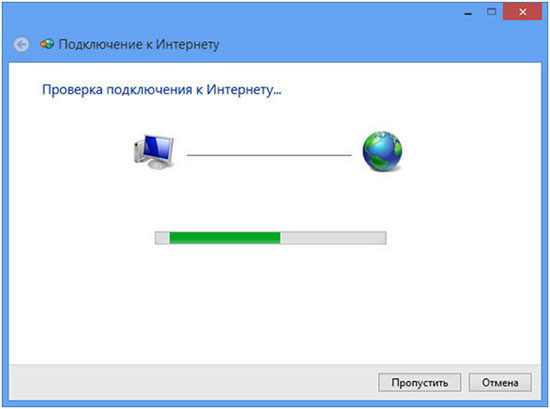 |
6. Select “High-speed (with PPPoE)”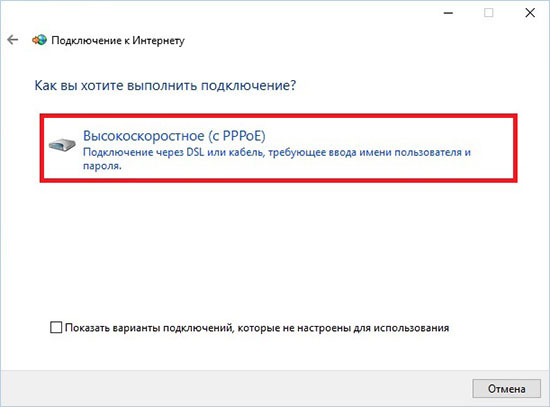 |
|
7. Select the component “Internet Protocol version 4 (TCP/IPv4)".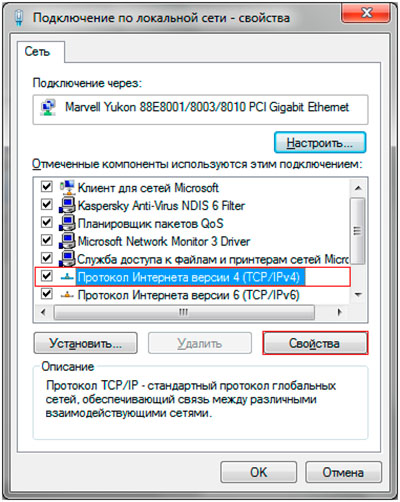 |
7. The system will request your credentials. Enter the username and password specified in the agreement. You can set an arbitrary “Connection name". After everything is entered, click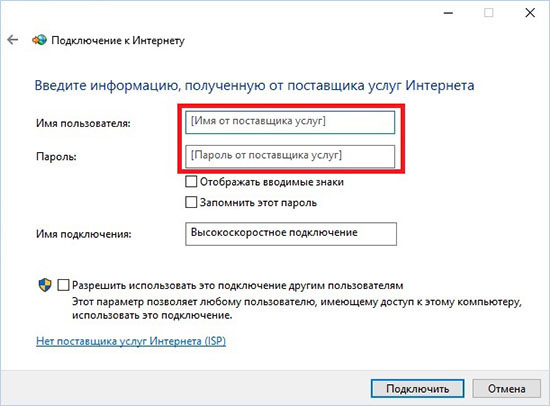 |
||
8. Select “Get IP address automatically” and “Get DNS server addresses automatically". Click the 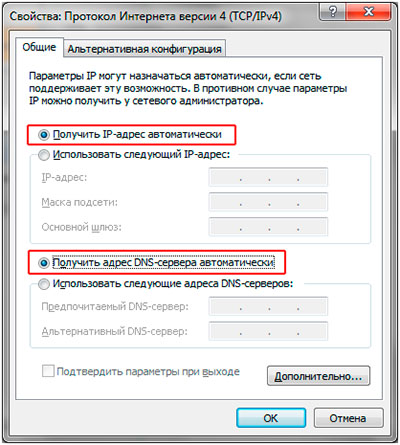 |
8. Wait until the check is completed.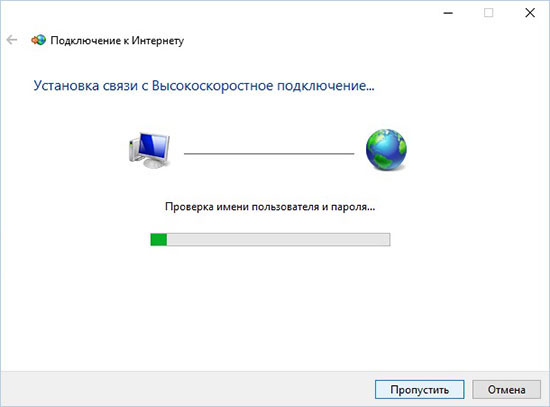 |
||
9. Press the  |
9. Setup is complete!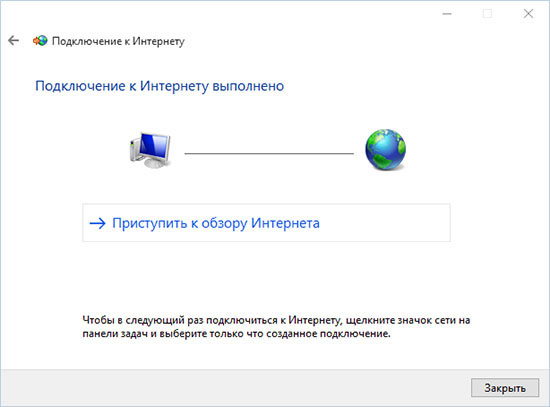 |
||
10. Click on the link “Setting up a new connection or network”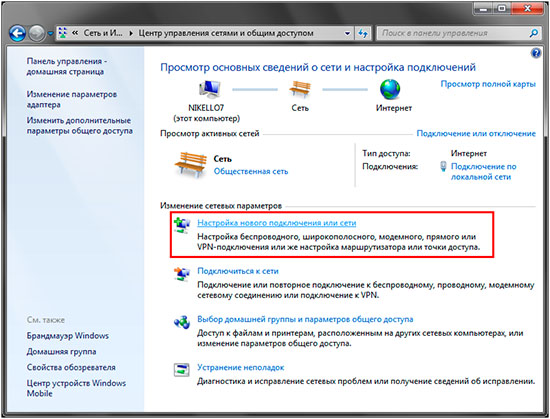 |
|||
11. In the window that opens, select the option “Internet connection" and click 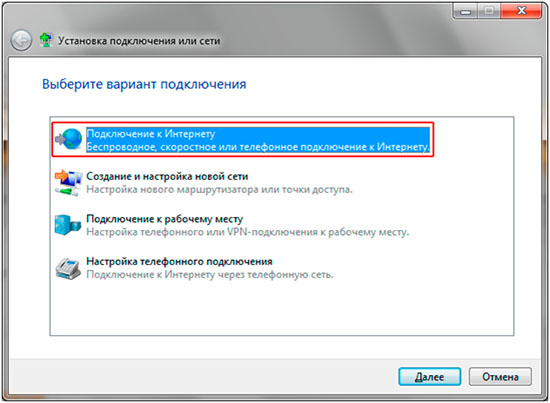 |
|||
12. In the window “How do I connect?” select the connection type “High-speed (with PPPoE)". |
|||
13. In the window that opens, enter your username and password. If there are other users on the computer who need to be given Internet access under this account, check the box “Allow other users to use this connection”. Click the 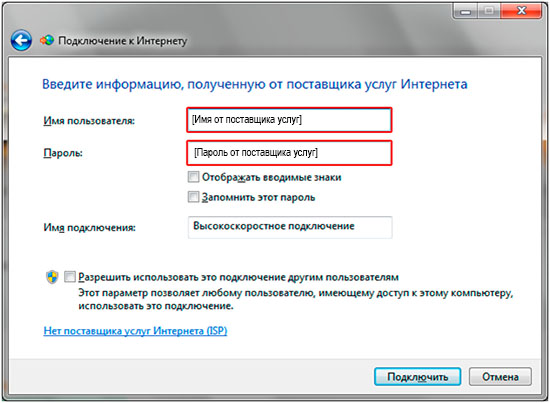 |
|||
14. We are waiting for the connection process.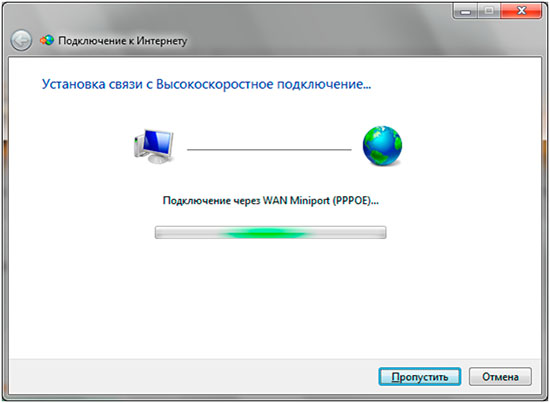 |
|||
15. Upon successful verification, the system will notify you about the creation of a new connection. Now you can click the 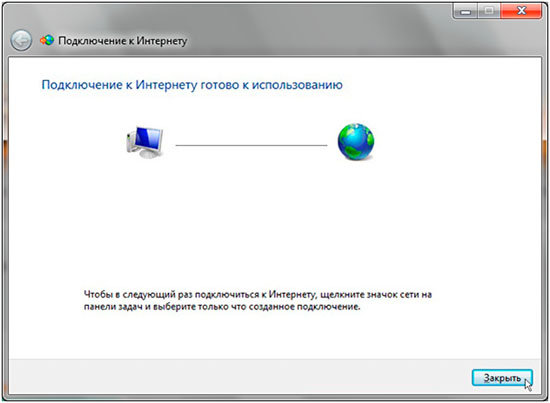 |

If you have any questions or problems with the setup, please contact Customer Support at +998(71) 200-200-1.